Event Teasers
CG_SBCrumb has become known to create event teasers when announcing new events. These teasers have become more intricate and have used cipher's to decode them.

Jango Fett


This teaser started on 9-7-2018 when Crumb did a forum post with the title 9-12-2018 and it contained a pixelated image.
Then on 9-10-2018 he did a new post titled How do you like the bounty hunting business with the fixed image referenced in his previous post.
On 9-12-2018, as referenced by the first teaser post, Crumb announced the Jango Fett Marquee Event with a hint at another new character coming to the game soon that will not be a Marquee.
Chewbacca


On 9-14-2018, two days after the Jango Marquee event tease SBCrumb dropped another puzzle in the Official Forums titled 9-20 Hunting for pieces that had an image of puzzle pieces with a link to another website that allowed people to put it together via Adobe Flash. It was solved in less than 25 minutes by people who used a script for to assemble the image revealing four lego bounty hunters, IG-88, Bossk, Dengar, and Boba Fett all standing around a mystery character.
- Post players used to try to work together to figure out the puzzle Official Forum: Hunting for Pieces.
On 9-19-2018 Crumb posted How about a day early where he revealed the hidden character to be Chewbacca and that Bounty Hunters will be required to capture this Legendary character.
Jedi Knight Revan

A Road Ahead was announced on October 5th, 2018. In it contained a teaser, 2 images written in Aurebesh.
The pyramid and the other image is a cipher. The teaser used the Playfair cipher which is translated to OTXYMNONOEUQOZTMOCXGVRHNXIEUTMCKUMKYDMUKBATK. Which is ultimately converted to THEROADAHEADISCOMINGSOXONTHEWAITWILXLBEWORTHITBITLYNAVERIDEJ.
Part of the conversion is a URL - bit.ly/naveridej (jedi revan backwards). This ultimately linked to a Jedi Revan trailer.
Back to Selection
C-3PO

This teaser started with two clues from forums posts.
The bottom left of CB_SBCrumbs photo had a color bar. If you convert that color bar from hexadecimal to ascii, it produces this URL - https://goo.gl/4HXR42. When you go to that URL, it'll download a JPG, however the format of the file isn't an image. If you take the binary from the file and convert it to ASCII, you get a lot of numbers and letters with "[K:C major clef=alto] [L:1/16] [M:none]" at the beginning. This was discovered to use the Solfa Cipher which is used to encode a message into music. The song from the YouTube video was actually the encoded message. The Solfa Cipher requires a key to decrypt it and one way to set the key is with a date. Using the date in the title of the forum post - 12/14/2018, the key was found to be Clef:Treble Tonic:A Mode:Dorian Unit:1/16th.
With this, you can begin to decode the cipher. The output from the cipher was more numbers and letters that had a pattern of a number, followed by an X, followed by hexadecimal. It was discovered that you repeat the hex for the number in front of it, and covert the hex to color, it would start to draw a picture. Parts of the image started appearing to look like C-3PO
This was solved in just under 3 hours.
Back to Selection
Han's Millennium Falcon
Episode 1: The original post

Found here, the original post contained a body of text, a table and a file which had a deconstructed dial in Aurebesh.
Filling out the table was completed very quickly, as was translating the dial. After that, using the table to read the dial was the obvious route but as it involved printing the dial (or finding some good editing software?) and doing some solving manually, this took some time. Thanks to one member on the forums, it was solved to be "Scoundrels4life".
By this point many had guessed it meant the OT Falcon would be coming and require scoundrels to unlock, but we needed to find the solution to the main body of text.
The main issue with decrypting the main body of text was that we didn't have any clue on how it had been encrypted. Some of it read like a poem that was introducing the challenge but some of it was clearly nonsense. Lots of people tried lots of things such as looking for anagrams, different ciphers, taking out names of scoundrels and their ships, reversing the dial to find a string of numbers for some code, but it wasn't until Crumb gave us another clue that we found out the next step.
Episode 2: What's cooking?
Crumb posted a picture of a piglet with the accompanying clue: I've just woke up and having my breakfast but all I can think about is getting more of this guy.
The hint was taken and people began to look for a solution using Bacon's cipher. Using this, each letter in a body of text is replaced by an A or a B which gives a string of As and Bs, these are grouped up into sets of 5 and using the chart for the bacon cipher, turned back into lettters (e.g. a set of ababa would become L). The issue for this was finding what criteria we needed to use to turn the text into As or Bs. We initially looked at many different possibilities such as changing letters from Scounderlsfourlife to As and the rest to Bs but eventually Crumb took pity on us and told us it was much more simple than we were trying to find.
After this second clue, someone tried using A-M = A, N-Z = B which gave a string of As and Bs which was decrypted Lone_Starr to give: N E V E R T E L L M E T H E O D D S T H R E E S E V E N T W O Z E R O O N E A T G M A I L D O T C O M D
Note: whilst we were still working on the bacon's cipher criteria, Crumb also posted :More Bacon then I get to the weekly word search in the newspaper (https://forums.galaxy-of-heroes.starwars.ea.com/discussion/192073/new-clue/p12) which hinted that a future element would be a word-search.
Episode 3: The bugged account
After solving the bacon's cipher and the table/dial we had [[1]] and Scoundrels4life. Someone quickly found out we could use these to log into the official forums which came up with an account with which Crumb had posted in the bug report section.
Title: I haz bugs. Text: You are free to use any methods necessary, but I want them alive! File: 102chars.txt (https://us.v-cdn.net/6025736/uploads/editor/ko/qyyzca0odp7e.txt)
The text seemed to refer to Bounty Hunters (scoundrels) and the title of the post made us think the clue might have errors in it.
By this point, the discord channel was going into overdrive as we tried to work out how we could decrypt the text. After analysing it we found that it could be split up into strings of characters with some key points:
- Strings were 5 or 6 characters long.
- Each string would start with either L, D or C.
- The strings always had 'x' as the 4th character
- After L/D/C was always a number, 1-9 (but C only went up to 8)
- After the first number was always a letter, A-G.
- After X, there was always a number, 1-21
We also found that there were 841 sets of data which we worked out was 29^2 which suggested each set would translate to a letter which would then form a 29x29 word search.
This part was tricky as there were a lot of possibilities. We looked to see if it could be colours, or ASCII code using Hex/Oct/Dec based on C/D/L. We even started looking at using Latin, thinking C,D,L could be 100,500,50 and there are only 21 letters in the Roman alphabet.
Eventually though, someone suggested using C=cantina node, L=light side node, D=darkside node.
From there it was only a few steps to get CDL = type of node, 1-9 and A-G were the specific node in that area, and x1-21 was the number of the letter of the shard it rewarded. e.g. C7Ax4 would be Cantina node 7A, 4th letter of the reward shard character's name ('S' in Mission Vao in this case).
Someone clever wrote a program to convert the 841 sets into letters which ended up giving us the basis for the word-search grid.
Episode 4: The word-search of doom

We created the grid using the letters from solving the clue, but there were a few errors to begin with as a few spaces were blank or seemed wrong. This was due to us not knowing whether to use the shard character names with or without spaces.
A google spreadsheet was created (final result here) to open up the word search to everyone. We thought that the title of the original file (102 chars) meant we had to find the names of 102 star wars characters so we needed all the help we could get.
To begin with we coloured the names we found in red and used different colours where we thought there were letter errors (turned out to be our mistake in translating the code) but we eventually began to change the letters to what they should be and turned everything we found to red.
At this point MobileGamer (https://www.youtube.com/channel/UCKjqnZEvjlf4TPtt9dmqhYw), who had been watching it for a while (along with Crumb and EVS-469 unbeknownst to us) started a live stream to tell everyone about the breakthrough and the puzzle in general. This was both a blessing and a curse as the document became flooded with people solving it (I shared the document with edit access but it seemed to lock people out after a while, necessitating re-sharing. Not sure what was going on with it - possibly too many users - but sorry about that!). We began to list all the names we found, along with where they were located (L4 down, or AB19 back down for example) so we could check nothing was missed.
Due to all the people finding names we quickly coloured in a lot of the grid but as it started to get messy and a small number of people started trolling we had to restrict access to only a few trusted people. At this point things slowed down as we had to check all the letters in the grid against what the were meant to be (thanks CG_EVS_469 for the confirmation reference table) and check that the correct boxes had been filled in. It took a long while and there a still possibly a couple of minor errors but eventually we found the names. Finding the correct names was tricky as CG_EVS_469 and CG_SBCrumb informed us there were a few we had found that weren't meant to be included (hazards of a large grid with so many unusual names) but we eventually confirmed all the correct names (again thanks CG_EVS_469 for providing the reference of character names).
Episode 5: Wait. There's more?
After finding all the names there were a number of characters left unshaded. Looking at these we identified the names of a number of ships. After being told there were 121 characters (thanks again CG_EVS_469 for the checkpoint) we figured these would fit into an 11x11 grid. We created the grid and populated it to move onto....
Episode 6: The last piece of the puzzle

In the end we had a second word search where the names were all star wars ships.
After colouring in all the letters we were left with an anagram which everyone worked out very quickly unscrambled to give MILLENNIUM FALCON.
We got confirmation on the official forums - "Congratulations - y'all got it! Hope you guys had fun with this one - I've already got some Ideas for next time. >:) - EVS-469"
Back to Selection
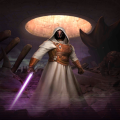
Darth Malak
Episode I - An Unexpected Journey AKA Darth Malak Confirmed
https://forums.galaxy-of-heroes.starwars.ea.com/discussion/200698/transmission-received
We started here, trying to crack the code. Immediately, we made the connection that the Rugmi being addressed at the beginning of the post was actually a clue for Imgur. In addition, we made the connection that “old techniques” most likely meant Morse code.
To get it ready to go through Morse, we converted each dark side character into a dash and each light side character into a dot.
Decoded, that spelled out “dev3kiy”, which we plugged into the Imgur URL to get imgur.com/dev3kiy, otherwise known as the Darth Malak picture.
Also included in the original post was a piece of text saying “Key Date: 29.1” which was not relevant to this section but would be vital to the next part when we identified it as the date Crumb had made comments on a CubsFanHan stream that were believed to be clues for an upcoming puzzle at the time. We found the comments and used them in the next stage of solving the puzzle.
Episode II - The Desolation of Wrong Ciphers AKA Delving Deeper AKA Looking at the Fine Print
Once we got the image of Darth Malak, we started looking closer into the details. We found Morse code at the top of the lightsaber, as well as boxes in the bottom left and right of the image.
The puzzlemasters then went on to decode the Morse code, getting the result of “BITLY” otherwise known as bit.ly making it known to everyone that we would be looking for a bit.ly URL of some sort.
From there, we left the Morse code alone because we couldn’t do anything else until we attempted to find the rest of the URL. We then went onto the boxes. Each had 3 colors in them, and we got the hex codes for those 3 colors. Then, we converted them to ASCII text, which is where we got the two 9 character strings from.
We knew that the clue “the bees have left the hive and the handkerchief is blue” was important to decoding the ASCII text strings but we didn’t know how.
We figured that the yellow box represented the “hive” part of the section and the blue box was the “handkerchief”. From there we ran into a bit of a wall trying to figure out which cipher would be used.
We tried multiple ciphers, including a Honey cipher due to the clue ‘the bees have left the hive’ and Hill ciphers due to the matrix-style of numbers we had.
Using hints dropped that Crumb’s messages from the previously streamed video were to be applied to the hex codes, we believed that “the bees have left” referred to removing Bs of some sort from the yellow section. This could have been removing any letter Bs from the clue we found, the B that appeared in the Hex results, or the part of the hex codes corresponding to the (B)lue values of the colors in the boxes.
We also noticed that the size of the colored areas in the boxes were different (4x4, 4x4, 4x5 pixels for the yellow section and 3 lots of 3x6 for the blue section). We pursued ideas around this for a while but ultimately, it led nowhere.
There were also a number of ciphers proposed repeatedly in the general clues chat which shall not be named and led down many rabbit holes and false paths. Many of the ciphers and methods that were tried did not work and actually made it more confusing (hence Crumb and Thor telling us we were overthinking it).
Episode III - The Battle of the Five Parts AKA Kit Reveal
We already had the character string from the yellow box, the character string from the blue box, two clues from Crumb’s stream comments and the bit.ly lead. With these five parts, we actually had everything we needed. We just had to find the right solution. All the other aspects that we had found in the picture or from clues and comments proved to be red herrings. By this point, we were about 20 hours in and the Powers That Be magnanimously decided to provide a few extra hints (and a few not so useful ones). It was at this point that CG also released the announcement of Darth Malak’s event to the forums - confirming our findings in the first part meant that Darth Malak was the focus for the puzzle and coming to the game (although no one realized how soon!)
Crumb had previously posted that the character strings from the colored boxes were accurate and CG Thor gave the hint of it being a Vigenere Cipher. Because nothing directly fit as the key. We had previously tried using the bees and handkerchief phrase in conjunction with the character strings but not identified any likely links. Fortunately, Adir returned to this idea and used a running cipher.
Using the running cipher with “the bees have left the hive“ and the character string from the yellow (hive) box “tswrymfxu“ returned “alsquinqu“. Doing the same to the other half gave us “argesimus”.
Adir - more versed in the Lore of Malak - identified that Squinquargesimus was Malak’s homeworld, we googled it and confirmed it. Then, once we added that to the BITLY we got from the morse, we ended up with the link bit.ly/alsquinquargesimus. When we searched it, it directed us to https://us.v-cdn.net/6025736/uploads/editor/0c/pha4vy4fsern.png, which was the picture of Malak’s kit and the final piece of the puzzle.
Lessons learned? Research the lore and respect Occam's Razor!
Puzzlemasters that worked on this (Discord names):
| Sigsig
Lone Starr Starrocks923 Ghost SR71Blackbird ExtremeLaser |
ColonelMatt88
Paul Anthony (Escape Pod cast) Bossle HEWBRIS Boser |
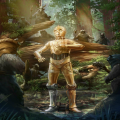
Jedi Knight Luke Skywalker
Collecting Pieces
This puzzle was unique in its method of starting. While one clue was posted by CG_SBCrumb on the official forums, there were three other clues given to community members to distribute, resulting in 4 sub-puzzles to solve. Each sub-puzzle consisted of a single image which could be converted into a black-and-white square piece.
Nonogram
Given to SigSig (SWGOH Events), these sequences of numbers can be used to describe a 23 x 23 nonogram puzzle, where the first set of numbers are horizontal clues, and the second set of numbers are vertical. While it can be solved in either configuration, the correct orientation can be determined through overlapping with other clues.
Hexadecimal
The next clue was posted by CG_SBCrumb, consisting of twenty 5-character hexadecimal strings. To solve this sub-puzzle, convert the hexadecimal to binary, and put it in a 20x20 grid, converting 0s to white and 1s to black.
Text Snippet
This clue was posted by Tmoney from Operation Metaverse, and consists of a paragraph of text. To solve this sub-puzzle, remove all non-alphabetic characters, resulting in 289 characters. Partition the remaining letters into As and Bs, as one might do for a Baconian cipher, where As are letters A-M, and Bs are letters N-Z, and move them into a 17x17 grid, converting Bs to black and As to white.

Grade 2 Braille
The final clue was given to Theothersean from Galactic War Report, consisting of an image describing six rows of nine Braille characters. When translated into Grade 2 Braille in an 18x18 grid, this forms the bottom right of the image
QR Code Breakdown
Once all the clues have been deciphered, you can assemble them into a single 40x40 pixel QR code by finding overlapping regions in the clues, and orienting the guide boxes according to the QR specification.

Once fully assembled, the QR code brings you to a fictitious Content Update post from CG_SBCrumb. Note: during puzzle solving, this content update was exposed to a developer tracking feed of some kind, making up for the fact that the QR code was incomplete. The full code was provided by SB_Crumb once the error was realized.
Final QR Code


Content update 50/1/05 and nope
This led us to a post that Crumb had edited on the forums, titled as content update 50/1/05. Contained within the post there was a tiny sliver of a picture and a maze in the shape of a hexagon, with the hint at the bottom that “the symbolic nature of this maze creates a double key: 5,8”.
Multiple people got to work solving the maze (both starting from the beginning and working backwards from the end), and the completed maze took the rough outline of the Rebel Alliance symbol (to the best of our knowledge, Signum had it first).

The letters along the correct path to solve the maze, when listed out, formed the following.
USYUUMXNEEIEEEETABTXFHDLFEUDHTSTTEATUISWOKWXLEXENNPATWNUWOASMQGYASEERWXHTURSEUTERRDTXRMSKEDTTCEHEEDEIFSLSROOMSPATFIONFYTTLOISEUMTNAEEEEIEWIHTAVRGILAWBNTPFNREOHAERPTAENOAKEOATTDTUTTTANHUEEHWHLOOXNSBNNEEUSIXODANCHOSIEOAFEOHRKKLBXVARDYIISPEFLMYEHRTLHODWRENXTNERTOSIEXNVIEBWSFTOCLYLALEABCXEERNAHPMHIVRCESLNAATLPOYASHERNUOTOHHKTGKEDOETHTNHYAORDXANEIEOBWOASTTDOONOINTESHUTRNWOEGEEHHRRCNXI
When the above was plugged into a double key (also known as a double transposition) cipher by Newershadow, with Rebel (five letters long) and Alliance (eight letters long) as the keys, you are given the following message (spaces added between the words to make it easier to read and understand).
YOUR SKILL ARE COMPLETE INDEED YOU ARE POWERFUL AS THE EMPEROR HAS FORESEEN OBIWAN ONCE THOUGHT AS YOU DO YOU DO NOT KNOW THE POWER OF THE DARK SIDE I MUST OBEY MY MASTER XX THE ANSWER YOU SEEK WILL REQUIRE WHAT IS HIDDEN HERE TO FIND THE LINK XX A FRAGMENT OR SNIPPET TO START WITH XX THEN FOLLOWED BY XX WHAT HAS A MOUTH BUT CANNOT TALK HAS A BED BUT CANNOT SLEEP THAT CAN RUN BUT CANNOT WALK XX AND XX SEVEN THREE FIFTEEN SIX TWELVE EIGHT SEVEN THREE EIGHT ONE FIVE THREE SIX
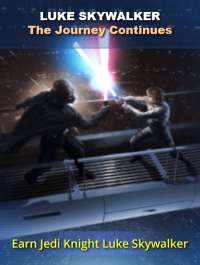
When the answer to the riddle (river) was plugged into a bit.ly link followed by the numbers, it brought us to a post on the forums by HanAndChewie, which contained a picture of Luke and Vader facing off with Emperor Palpatine in the background.
https://forums.galaxy-of-heroes.starwars.ea.com/discussion/230271/part-2

Part 2 - A closer look
While it initially looked like the post of Part 2 by HanAndChewie on the Forums may have been the end (especially because Crumb edited it to say congratulations at the bottom) there was still one more trick left. A close examination of the picture provided revealed (much like the Malak puzzle) that there was a code hidden within the post. We noticed stars were in an odd shape in the top right corner of the picture, in the highest segment of window in a direct line above Palpatine’s head. We quickly realized they were in braille, which we had already used before in the puzzle, and got to work decoding that.
The final answer
Using the braille found in the stars above Palpatine’s head, we were able to discover that the braille spelled out two separate fragments. We found that one was the word Luke, and the other was #327. 327 is a common number occurring in Star Wars. When added to a bit.ly link, and forming bit.ly/luke327, it takes you to an unlisted Youtube video, which contained the reveal of Jedi Knight Luke.
https://www.youtube.com/watch?v=RaiZuVtBcSE&feature=youtu.be

Puzzlemasters
Puzzlemasters that worked on this (discord names)
| Fatal
Grue SR71Blackbird HEWBRIS Kasfunatu Sigsig |
Lone Starr
TMoney newershadow Paul Anthony ExtremeLaser ColonelMatt |
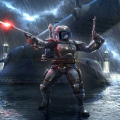
Hunter (Bad Batch)
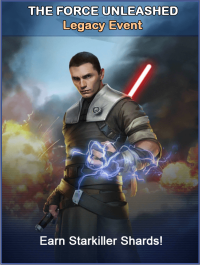
Starkiller
This teaser started on 11-10-2021 with the official forum post Scheduled Update: 11/10/2021 by CG_Crumb. It took about 13 hours to solve.
Back to Selection
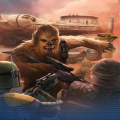
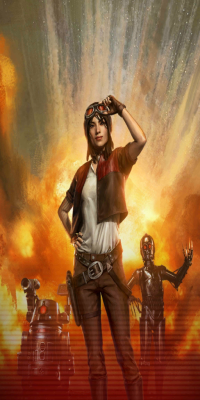
Doctor Aphra
This teaser started on 9-28-2022 when content creator CubsFanHan received a package in the mail from CG_Crumb that told him to not open it until 9-30-2022. It took about 16 hours to solve.
Back to Selection